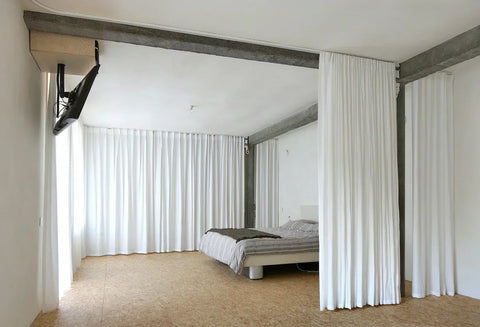
How to Plug Light Leaks from Drapery Edges

Curtains are masters of mood-setting - softening the space visually, adding visual texture and muting the harsh sunglare. But when your goal transcends to creating a dark cocoon of a room, they need to step up even further and banish every last sliver of light sneaking in from their edges. So in this blog, we bring you every tip, trick and tool you need to plug stray light leaks from your curtains' edges. Let’s begin!
Expand the Coverage: Mount the Pole Higher and Wider

The first step to flawless light blockage starts not with the curtains but with the hardware. Mounting the hardware correctly is essential to supporting drapery in its mission to curb light leaks. Here are our stylists’ key recommendations in this regard -
One, if there is enough space around the window, let the pole/track extend 6-12 inches beyond the window trim. And two, mount the pole/track at least 6-12 inches above the window.
This way, the curtains will overlap the window generously on all sides, making it more difficult for light to bleed in at the seams. Once you’ve decided the optimal mounting position for your hardware, just be sure to adjust the planned sizes of your drapery panels accordingly.
Seal It Flawlessly: Close the Side Gaps
Traditional drapery poles are usually affixed to 3-5 inch-long brackets, leaving enough of a gap on the sides for light to peek in from between the curtain and the wall. Plug this gap with the ‘drapery return’ - the portion of the drapery panel that folds back to the wall. This can be done in two ways:
French Return Poles

Clients who are yet to invest in hardware can consider installing French poles, also known as self-return poles. These poles do not feature finials on the ends, instead, they curve at the ends towards the wall and attach to it. Thus, the curtains curve around the window, wrapping the sides completely and sealing all light leaks from the gaps.
Hook & Eye Method

For clients with standard drapery poles mounted in place, the ‘hook & eye’ technique can serve as an easy solution while giving a professional touch to your decor. This simple hack entails nailing a screw eye bolt on both ends on the wall, and inserting the last drapery pin on the curtain’s edges into the eyehole of the screw bolt.
Note that whether you choose a French pole or the hook & eye method, the curtain has to be wide enough to accommodate the drapery return. So, please do account for the drapery return when measuring the width for your curtains.
Extend the Drop Point: Mount Floor Length Drapes

Curtains that stop at the sill may meet the goal of covering a window, but when flawless light-blocking is the goal, you have to make them go the extra mile. So, even if you have small or medium-sized windows, let the curtains be floor-length for sweeping coverage. Not only will the extra coverage reduce light leaks from under the drapery, but the curtains will also billow less in the wind as the drapes gain weight, further contributing to better light control.
But, it doesn’t end at choosing floor-length, the exact drop-point matters. To cancel light leaks from under the drapery, avoid letting your curtains ‘float’ above the floor, leaving a gap. Instead, choose the ‘graze’, ‘break-puddle’, or ‘puddle’ drop point, at which the curtains seamlessly touch the floor, leaving no opening for light to bleed in at the bottom hem. For a detailed explanation about these drop points, read our blog post on ‘How Long Should My Curtains Be’.
Intensify the Insulation: Go for a High Fullness Level

When the curtains are ‘full’ with dense pleats, their ability to block light is enhanced. So, do not skimp on curtain width if room-darkening is on your agenda. Go for a ‘fullness level’ between 2x-3x, and your curtains will fall into lush, robust pleats. If you’re not sure what ‘fullness level’ means, please refer to our Drapery Measurement Guide, where we explain it in detail.
Avoid the Chinks: Opt for Full-Coverage Heading Styles

The heading style - that is - the design of the curtain header, is often considered a matter of aesthetics when, in fact, it has a rather important role to play in blocking light. For enhanced light control, we recommend opting for heading styles that do not feature any loops or holes for light to bleed through. Styles like pinch pleats, for example, have pleated, full-coverage headers that don’t feature any such gaps. Other styles with full coverage include flat panel tops, pencil pleats, rod pockets, and back tab tops. On the other hand, styles like tie tops, grommet tops, and tab tops feature tabs, loops, or eyeholes through which light can stream in. Should you be keen on one of these styles, we reiterate our recommendation to mount your hardware a few inches above the window to minimize light leaks through the header gaps.
HOMESEWN HANDBOOK: Drapery Heading Style Guide
Trust Head Gears: Layer with Valances

Window valances are often deemed to be mere aesthetic additions to a room, when, in fact, with the right choice of valance, light leaks from the top can be plugged flawlessly. At Sewn, you have over a dozen styles of valances to choose from. For maximum light blocking, we recommend our board-mounted valances because, unlike pole-mounted valances, the board-mounted versions make seamless contact with the wall, leaving no gap for light to seep in from above the drapery.
HAUL EM' HOME: Custom Valances
Grow the Team: Opt for Layered Treatments

More layers simply mean improved insulation for your home; so when it comes to blocking light leaks, pairing your curtains with roman shades is a winning formula. Fitted snugly within or just outside the window frame, roman shades play the first line of defence, providing a clean, close-to-the-glass barrier to incoming light. Over them, curtains become a stronger, more insulating layer with their flowy drape and rich pleats. Together, the two layers create a blackout barricade that is not just effective—but also elegant. When layered thoughtfully, curtains and shades go beyond light control and render the kind of detail and depth that elevates the design from fine to fab. Light leaks don’t stand a chance, and your room gets the best upgrade, too.
All’s Well that Blocks Well

Light control may start with keeping light out, but it doesn’t end there. It is also about setting the mood, enhancing comfort, and improving the overall functionality of your drapes. And in that refined equation, light leaks are quiet intruders - unwelcome, but thankfully entirely preventable. With an intelligent combination of well-fitted custom drapes, thoughtful hardware decisions, and smart layering, you can seal off the edges and block out even the most persistent slivers of light. So, whether you’re looking for deep, uninterrupted sleep or immersive movie nights, don’t let light leaks chip away at the experience you’re curating. When it comes to light control, it’s the small details that deliver big results—and now you know exactly how to get them right!


